JavaScript First-Party Tracking
JavaScript tracking is the easiest method for tracking conversions when you control the thank-you or confirmation page. It uses first-party cookies and inline scripts to capture visitor data and report conversions. While convenient for product vendors, server-to-server methods (S2S postback or IPN) provide more accurate tracking as they don't depend on browser-side execution.
How It Works
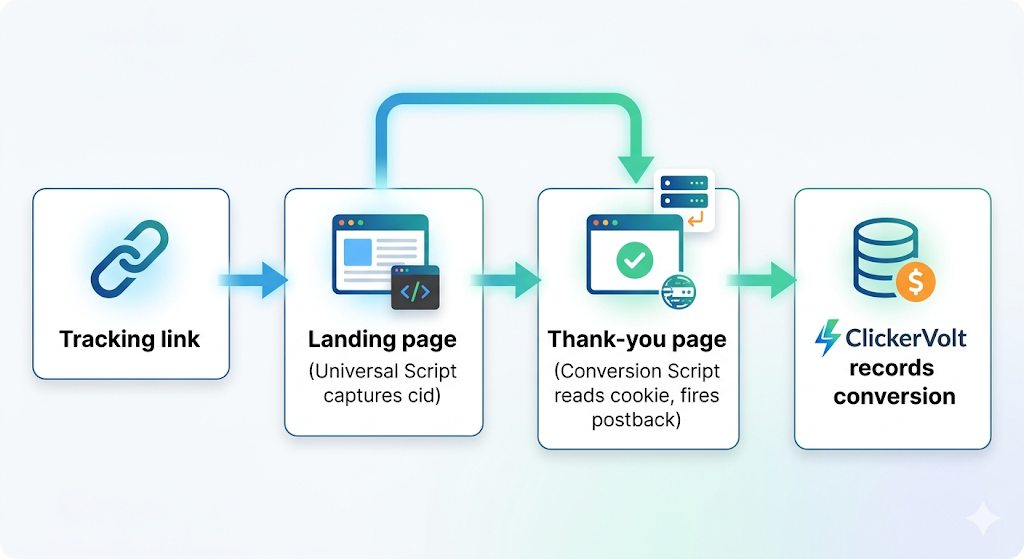
JavaScript tracking uses a two-script system that works together to track conversions:
Script 1: Universal Tracking Script
- Installed on ALL pages of your funnel (landing, thank-you, etc.)
- Captures visitor identity from URL parameters (target_id and cid)
- Stores this data in a first-party cookie (_cv_conv)
- Same script for all your targets - add it once per page
Script 2: Conversion Script
- Installed ONLY on your thank-you/confirmation page
- Reads visitor identity from the cookie
- Fires conversion postback to ClickerVolt with revenue and transaction ID
- Target-specific - different for each target you configure
When a visitor clicks your tracking link, ClickerVolt redirects them with target_id and cid parameters. The Universal Script captures these and stores them in a cookie. When they complete a purchase and reach your thank-you page, the Conversion Script reads the cookie and reports the conversion.
Key Benefits:
- First-party tracking using your domain's cookies
- Instant conversion reporting (appears within seconds)
- No dependency on third-party services
- Works with any traffic source or offer
- Supports revenue and transaction ID tracking for deduplication
Setup Instructions
Step 1: Access Tracking Settings
- Open your link in the editor
- Add or edit a target
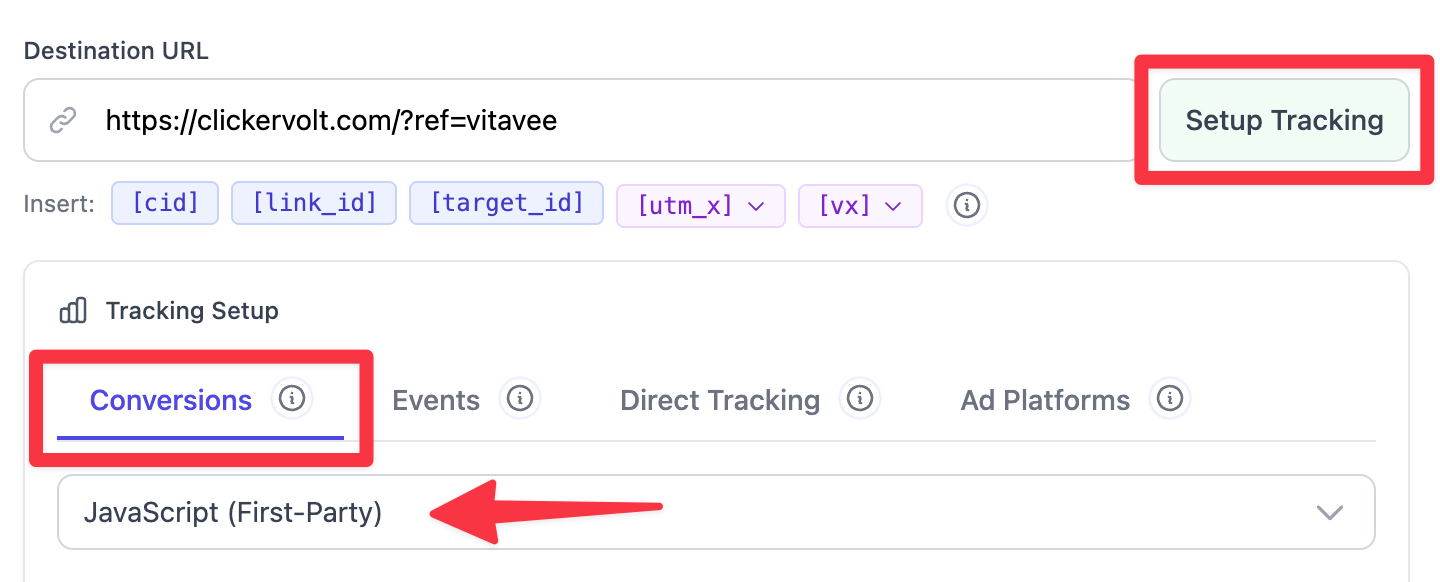
- Click the "Setup Tracking" button next to the target URL field
- Select the "Conversions" tab
- Click the "JavaScript" method option
Step 2: Install Universal Tracking Script
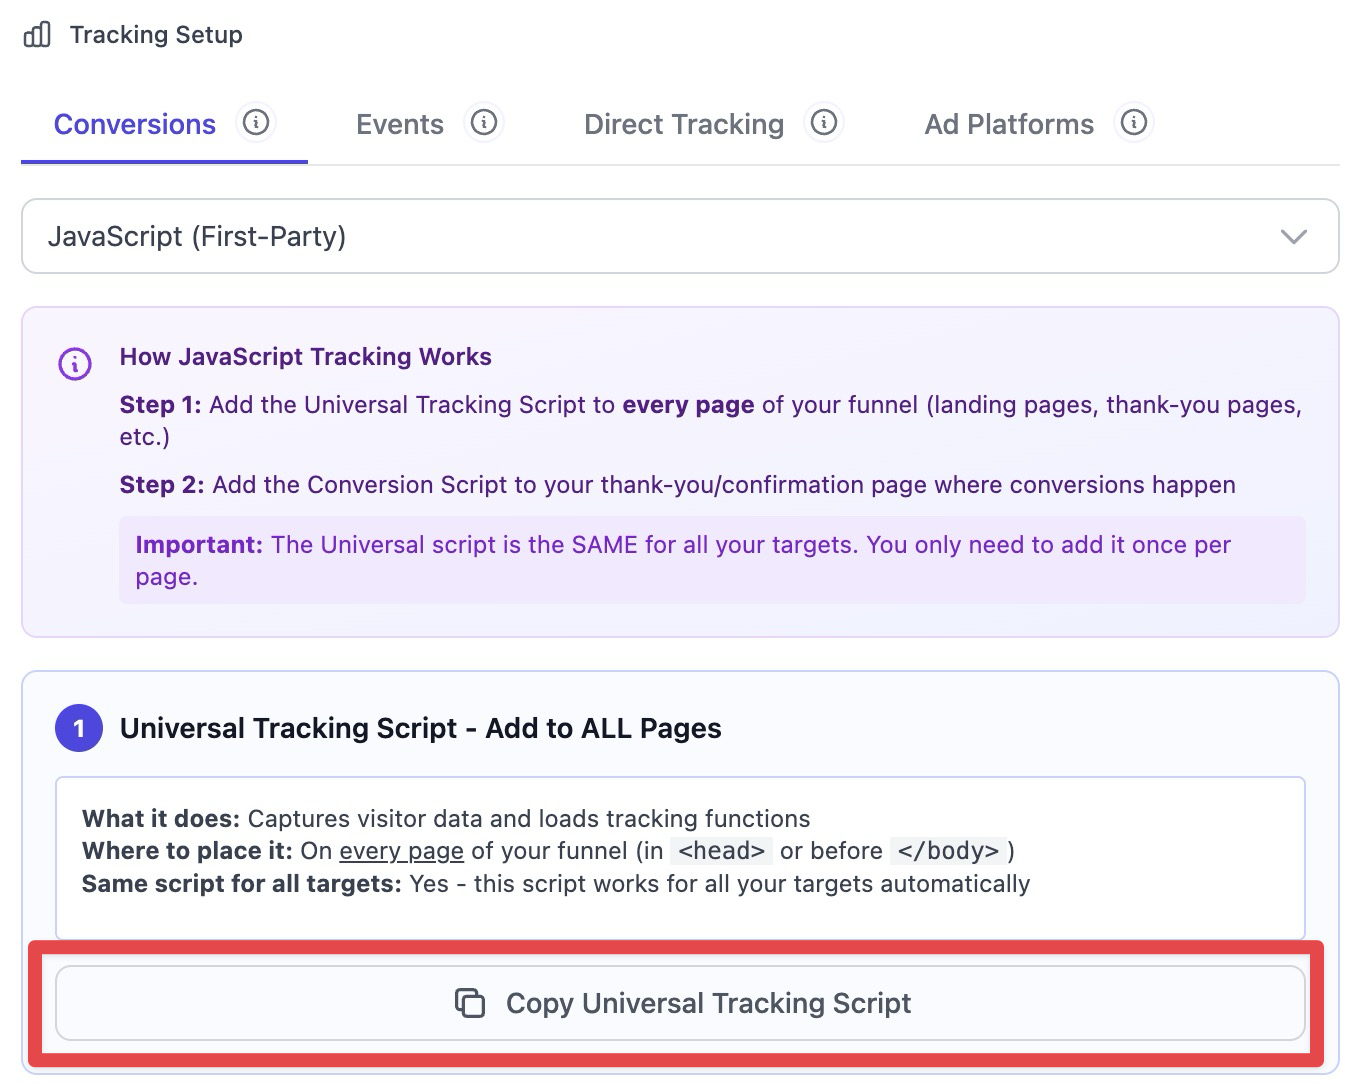
Copy the Universal Tracking Script and install it on EVERY page of your funnel:
- Landing pages where visitors first arrive
- Thank-you/confirmation pages where conversions happen
- Any intermediate pages in your funnel
Place the script in the head section before the closing tag. This is the same script for all your targets, so you only need to add it once per page. Or better, use a system like Google Tag Manager to inject it automatically into all your pages.
Step 3: Configure Conversion Script
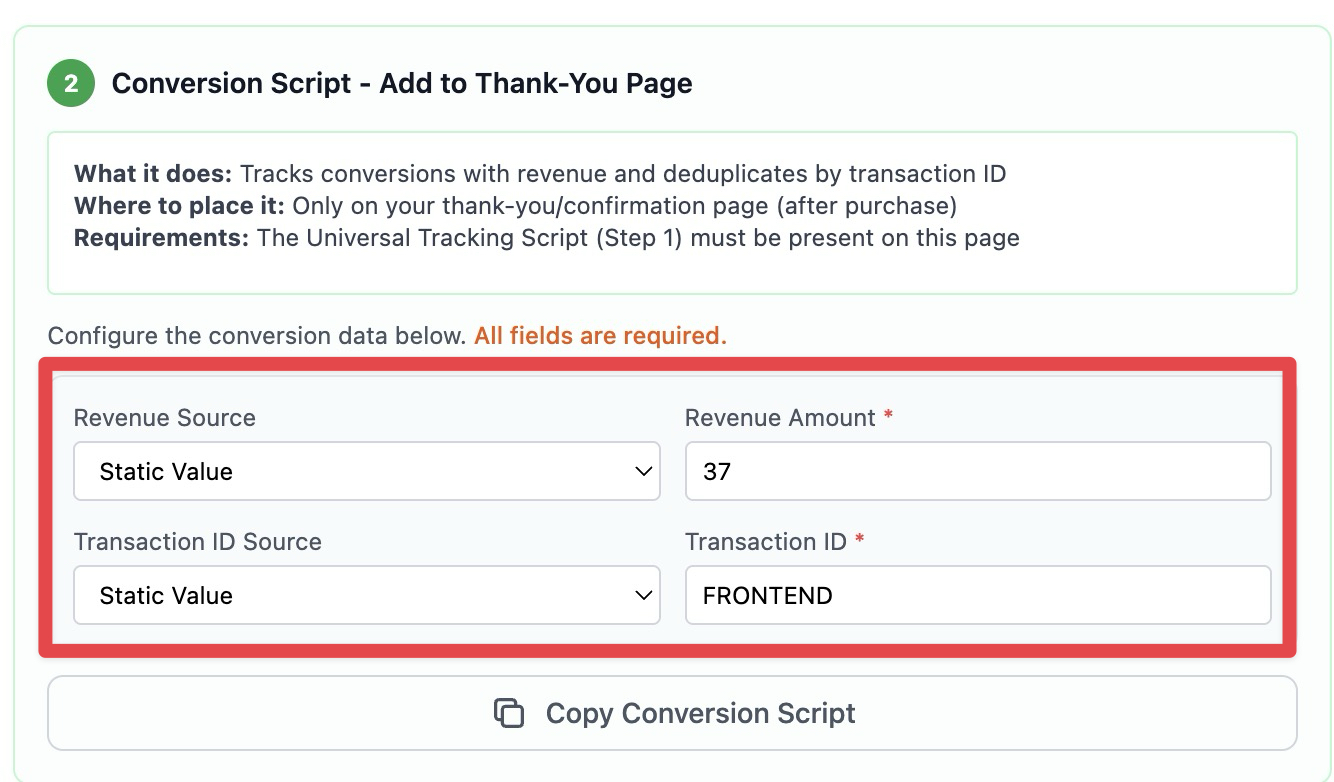
Still in the tracking setup interface, configure the conversion script parameters:
- Revenue Source: Choose "Static Value" (e.g., 49.99) or "JavaScript Variable" (e.g., window.orderAmount)
- Revenue Value: Enter the static value or variable name
- Transaction ID Source: Choose "Static Value" or "JavaScript Variable"
- Transaction ID Value: Enter a unique transaction identifier (used for deduplication)
Both revenue and transaction ID are required fields.
Step 4: Install Conversion Script
Copy the generated Conversion Script and install it ONLY on your thank-you or confirmation page, preferably just before the body closing tag. This page must also have the Universal Tracking Script from Step 2.
Step 5: Test the Setup
- Save your target with the "Javascript" conversion method selected
- Open a private/incognito browser window
- Click your tracking link
- Complete the conversion action (purchase, signup, etc.)
- Check your ClickerVolt statistics - conversion should appear within just a few seconds
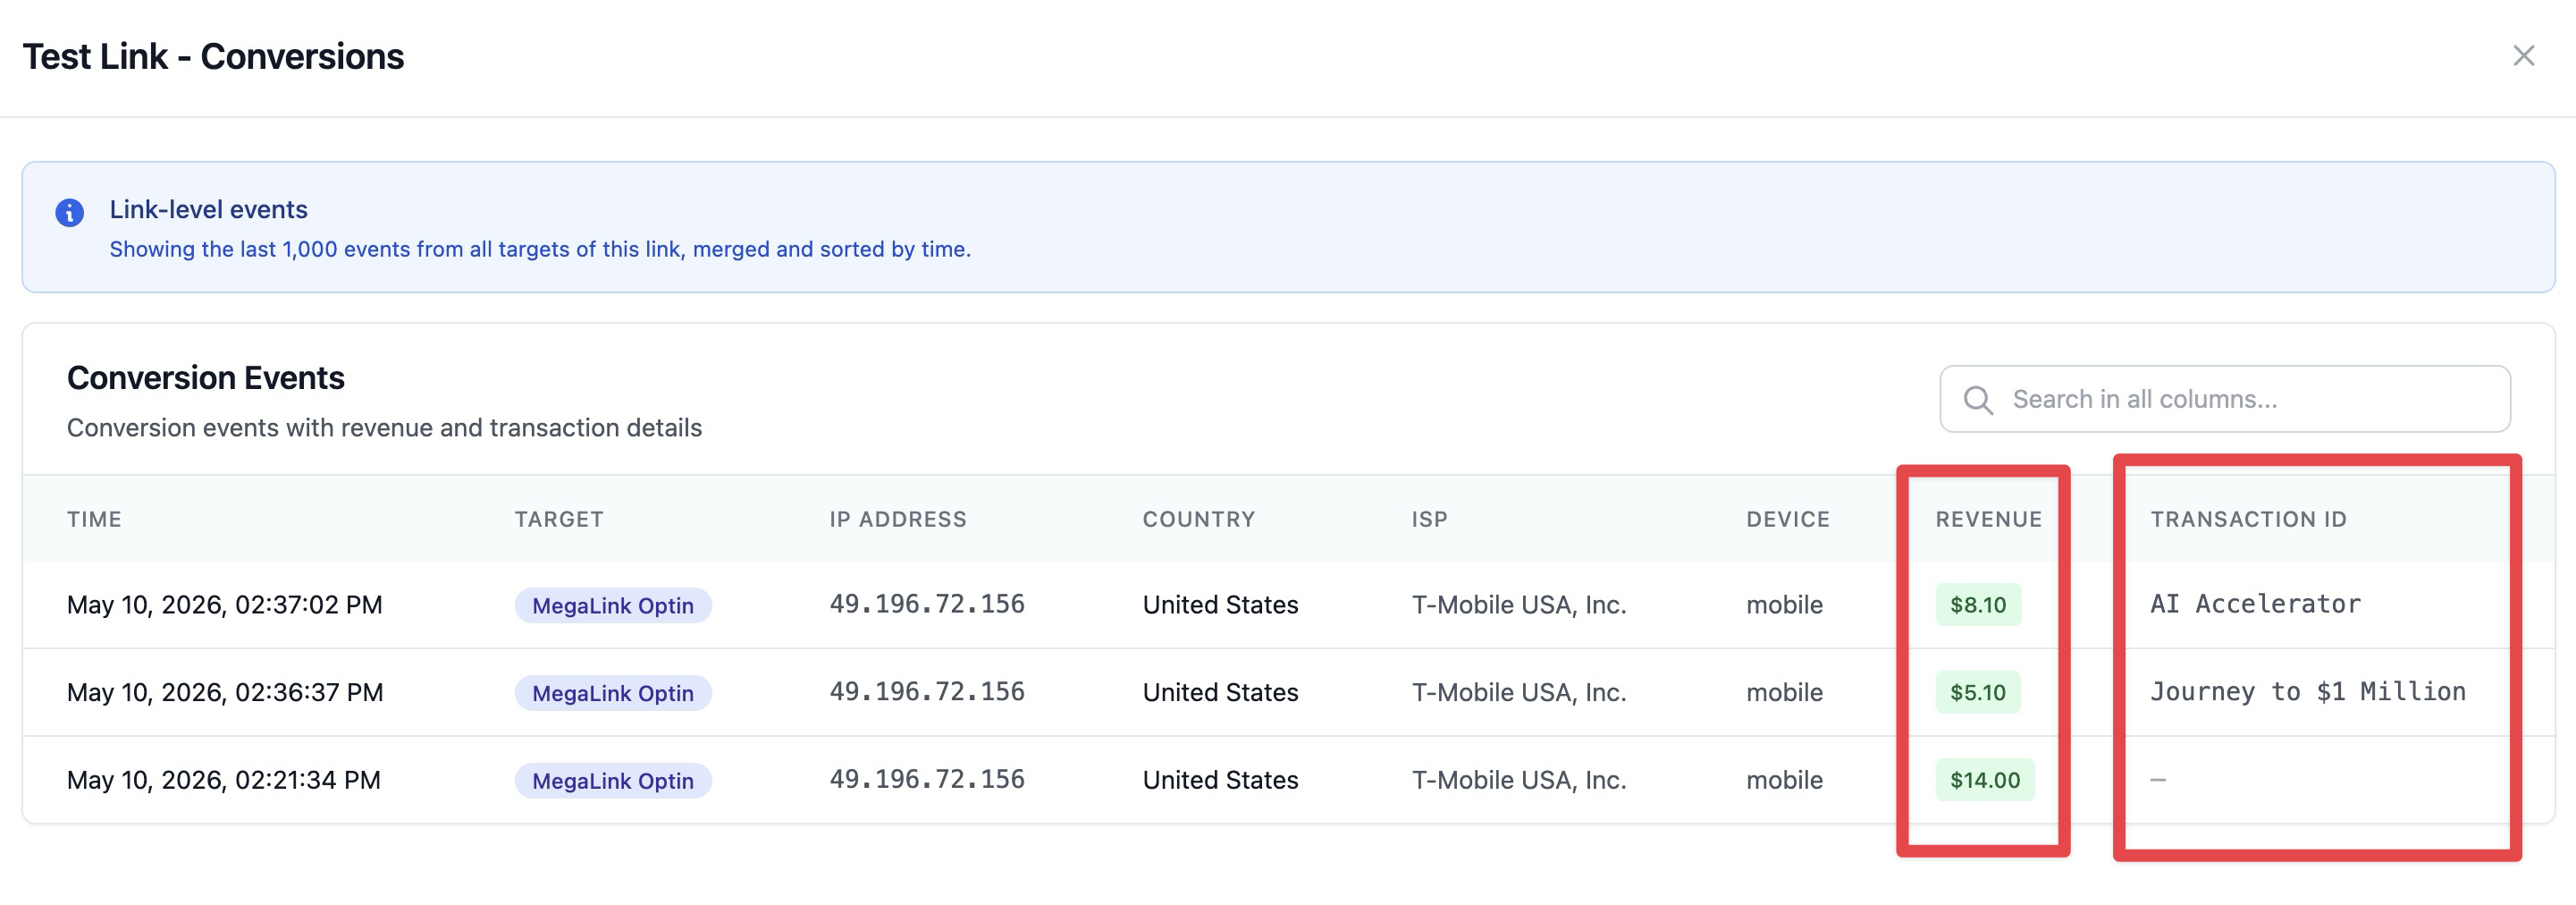
- Verify revenue and transaction ID appear correctly
Common Use Cases
E-commerce Order Confirmations
Place the script on your order confirmation page after successful payment. Track which traffic sources and campaigns drive the most sales.
Lead Generation Forms
Install on the thank-you page shown after form submission. Track which ads and landing pages generate the most leads.
Email List Opt-ins
Add to your email confirmation or welcome page. Measure the effectiveness of your lead magnets and opt-in funnels.
Revenue and Transaction Tracking
Revenue and transaction IDs are configured when you set up the conversion script (Step 3 in setup instructions). You have two options for each field:
Static Values
Use when all conversions have the same value (e.g., "$49.99" for a fixed-price product). Enter the amount directly in the configuration interface.
JavaScript Variables
Use when conversion values vary (e.g., shopping cart with different order totals). Enter the variable name (e.g., "window.orderAmount" or "window.dataLayer.revenue") and ensure your thank-you page makes this variable available before the conversion script executes.
Transaction ID Deduplication
The transaction ID prevents duplicate conversions. If a visitor refreshes the thank-you page, ClickerVolt will only count the first conversion with that transaction ID. Use your order ID, payment transaction ID, or any unique identifier.
Click Cost Tracking
To track click costs, add the cost parameter to your tracking link URL when creating your ads:
https://yourdomain.com/abc123?cost=0.50
Many traffic sources provide dynamic cost tokens (e.g., {bid} or {cpc}) you can use to automatically capture the actual cost per click.
Advanced Topics
Multiple Conversion Events
JavaScript tracking supports both standard conversions and custom events (Events 1-10). Standard conversions use the Conversion Script described above. Custom events use a separate event tracking script available in the "Events" tab of the tracking setup interface. You can track both types on the same target.
Custom Domain Tracking
If you're using a custom domain for your tracking links, the conversion postback will be sent to your custom domain. This provides true first-party tracking where all cookies and requests stay within your domain.
HTTPS Requirements
Your thank-you page must use HTTPS for conversion tracking to work reliably. Modern browsers block scripts and cookies from HTTP pages when the tracking link uses HTTPS, causing conversion tracking to fail.
Troubleshooting
If conversions aren't appearing:
- Verify BOTH scripts are installed (Universal on all pages, Conversion on thank-you page)
- Check browser console for errors (look for [CV] messages)
- Ensure visitors are clicking through your tracking link first (with target_id and cid parameters)
- Confirm the cookie _cv_conv exists in browser dev tools
- Verify revenue and transaction ID values are correctly configured
- Check that your thank-you page uses HTTPS