Webhook Configuration
Webhook Configuration
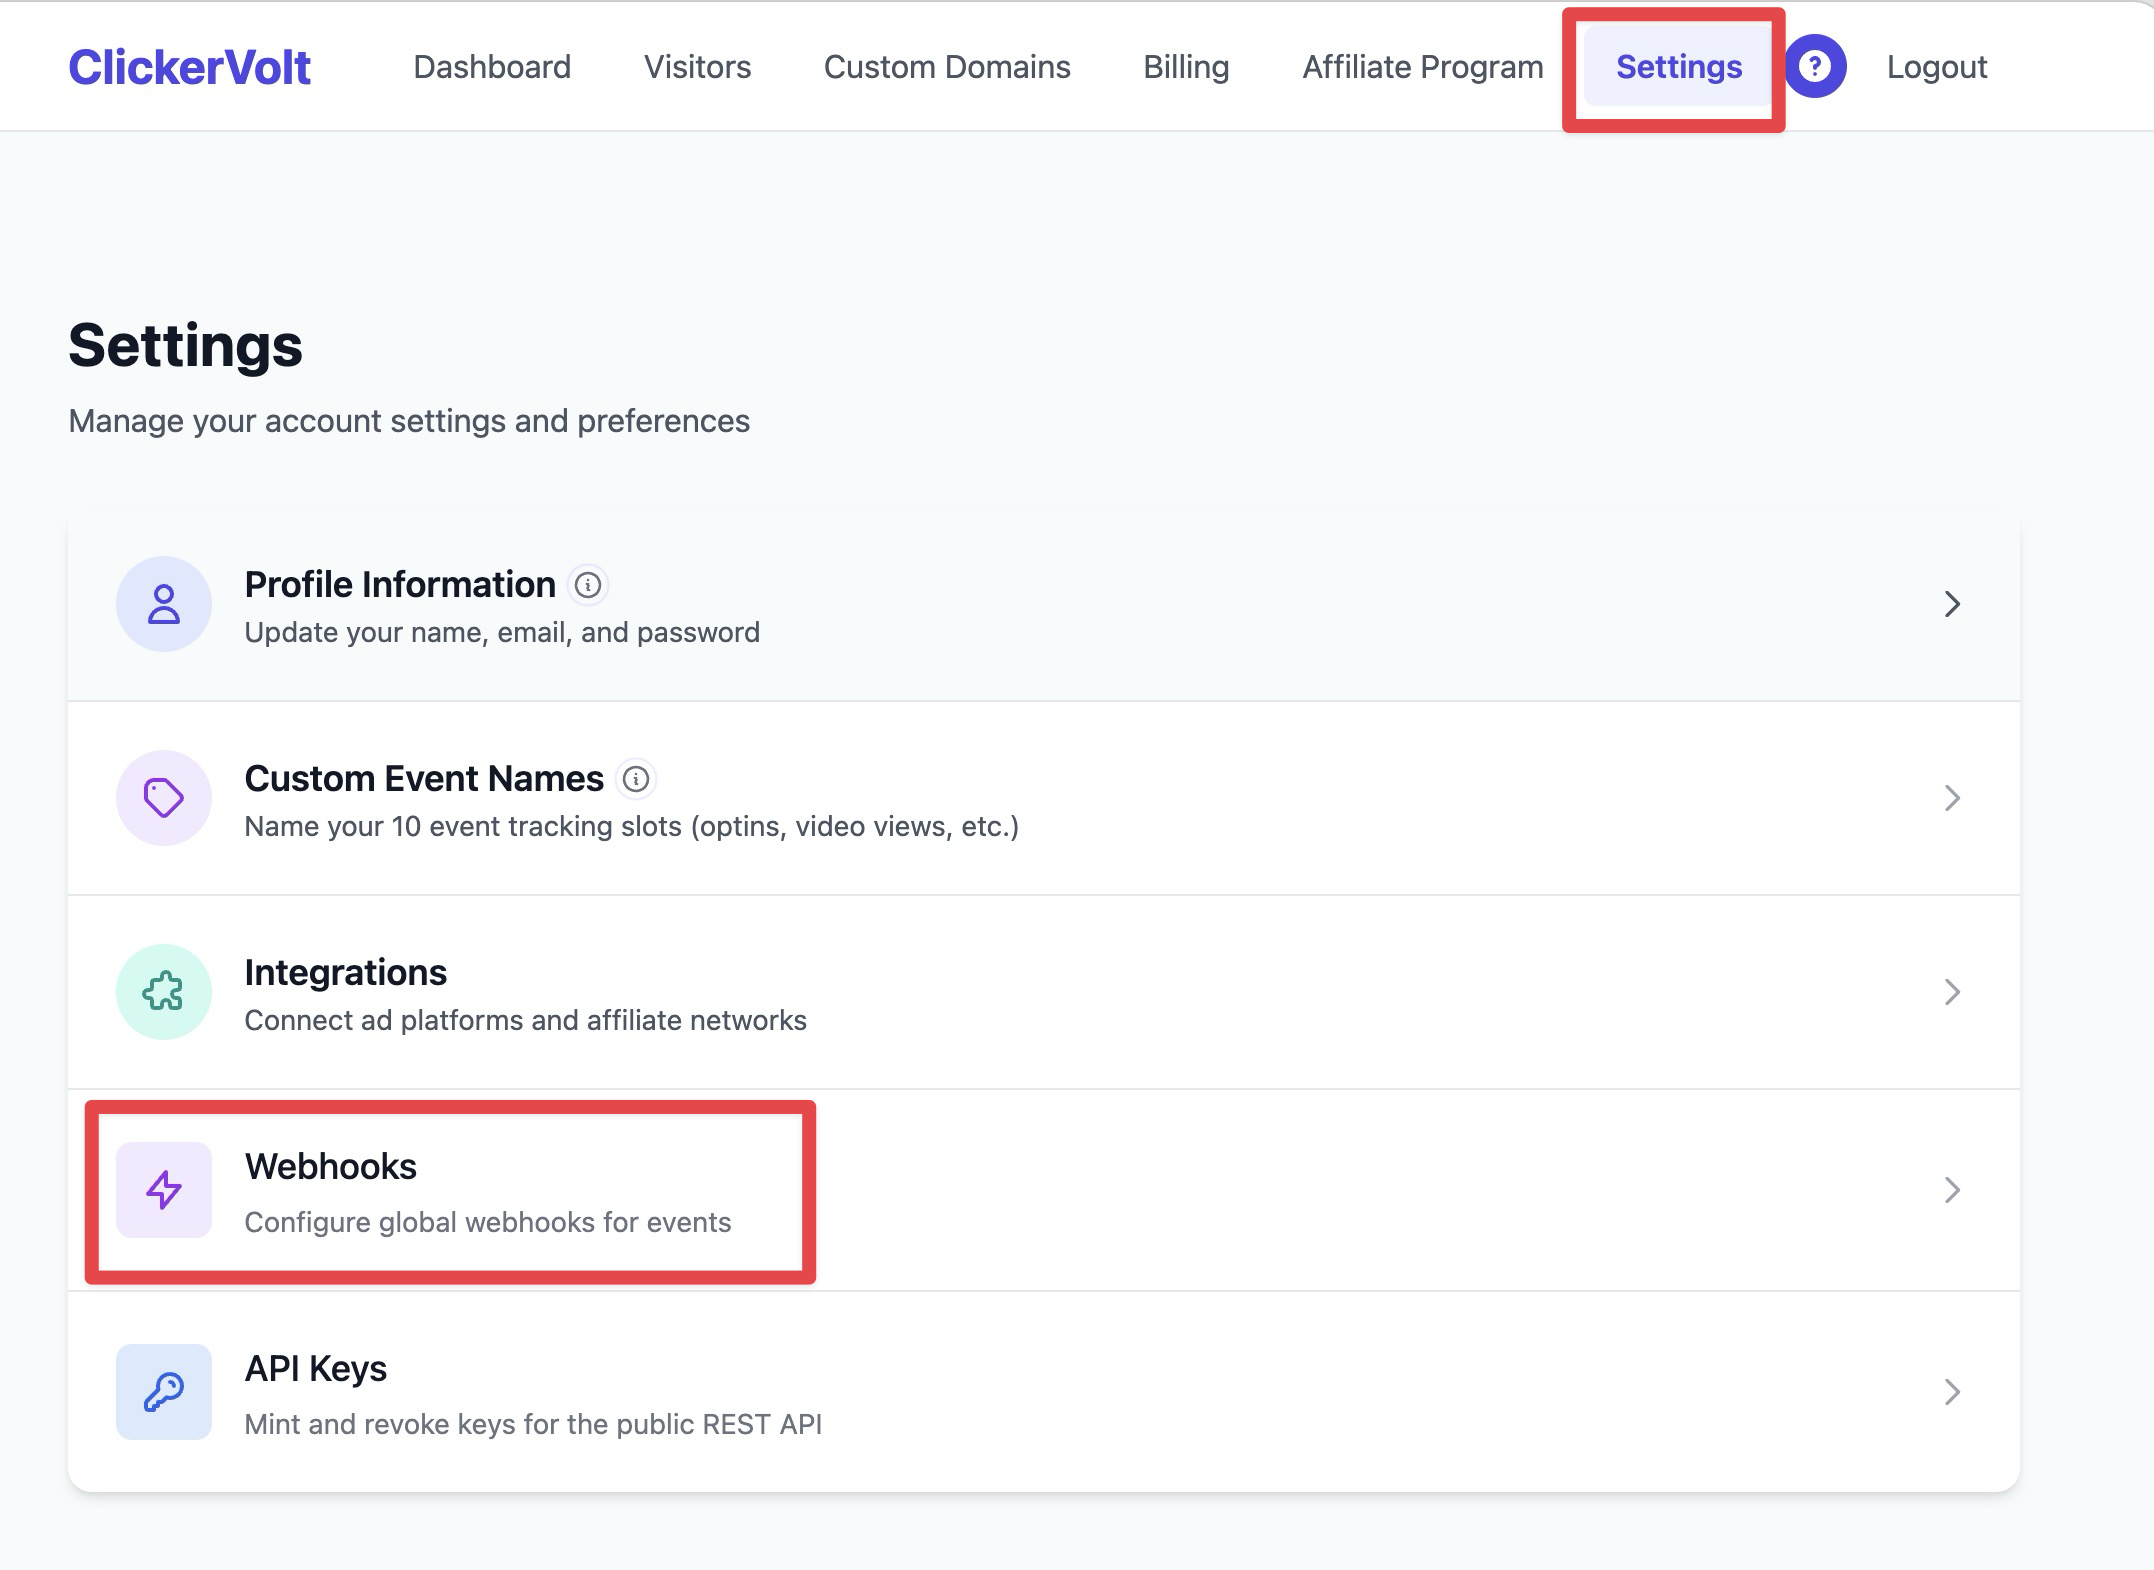
Webhooks allow you to send real-time notifications to external systems when specific events occur in ClickerVolt. This enables powerful integrations with CRMs, email platforms, analytics tools, and custom applications.
This guide covers how to configure webhooks, select trigger events, set up conditional rules, and use the per-condition attribution model for advanced filtering.
Trigger Events
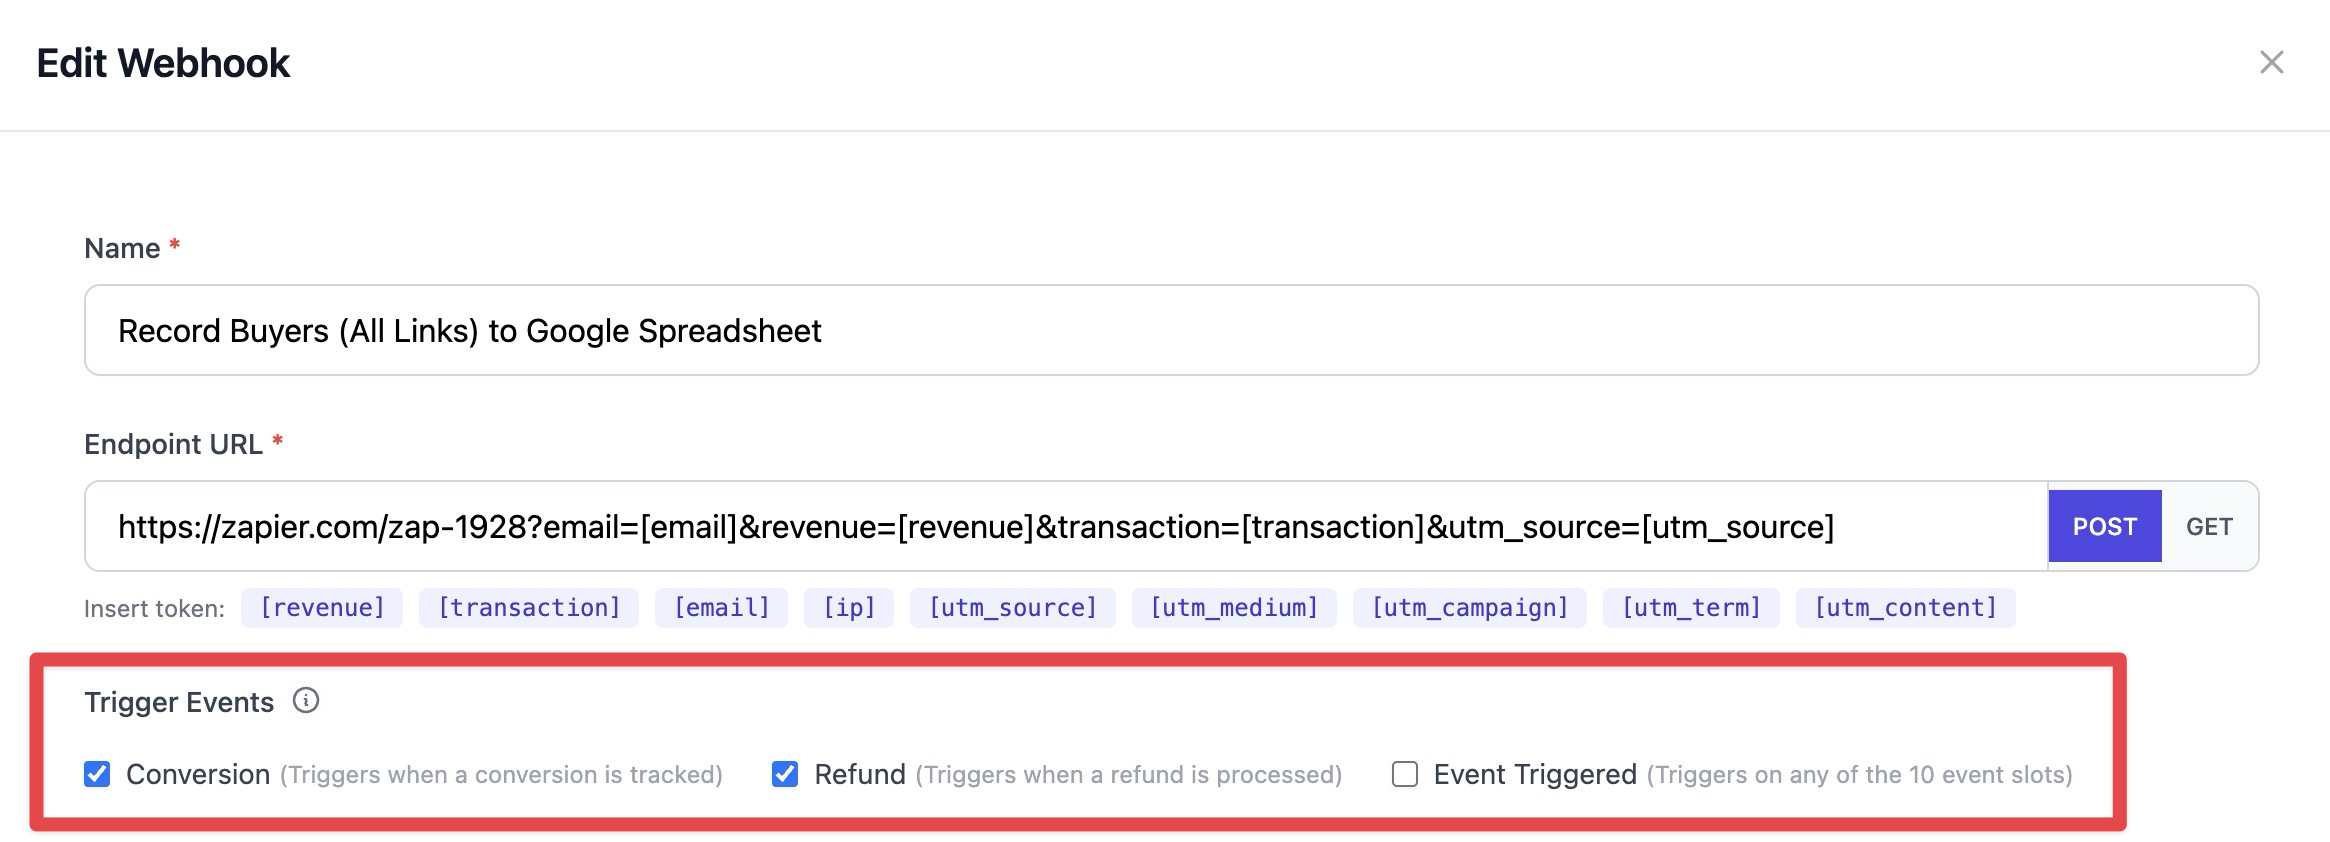
Webhooks can be triggered by specific events in ClickerVolt. Choose which events should fire your webhook:
- Conversion: Fires when a conversion is recorded (sale, lead, signup)
- Refund: Fires when a refund is processed (customer request or chargeback)
- Event Triggered: Fires when any custom event (event1-event10) is triggered
You can enable multiple events for a single webhook. Each enabled event will send a separate HTTP request to your endpoint when it occurs.
Conditional Rules
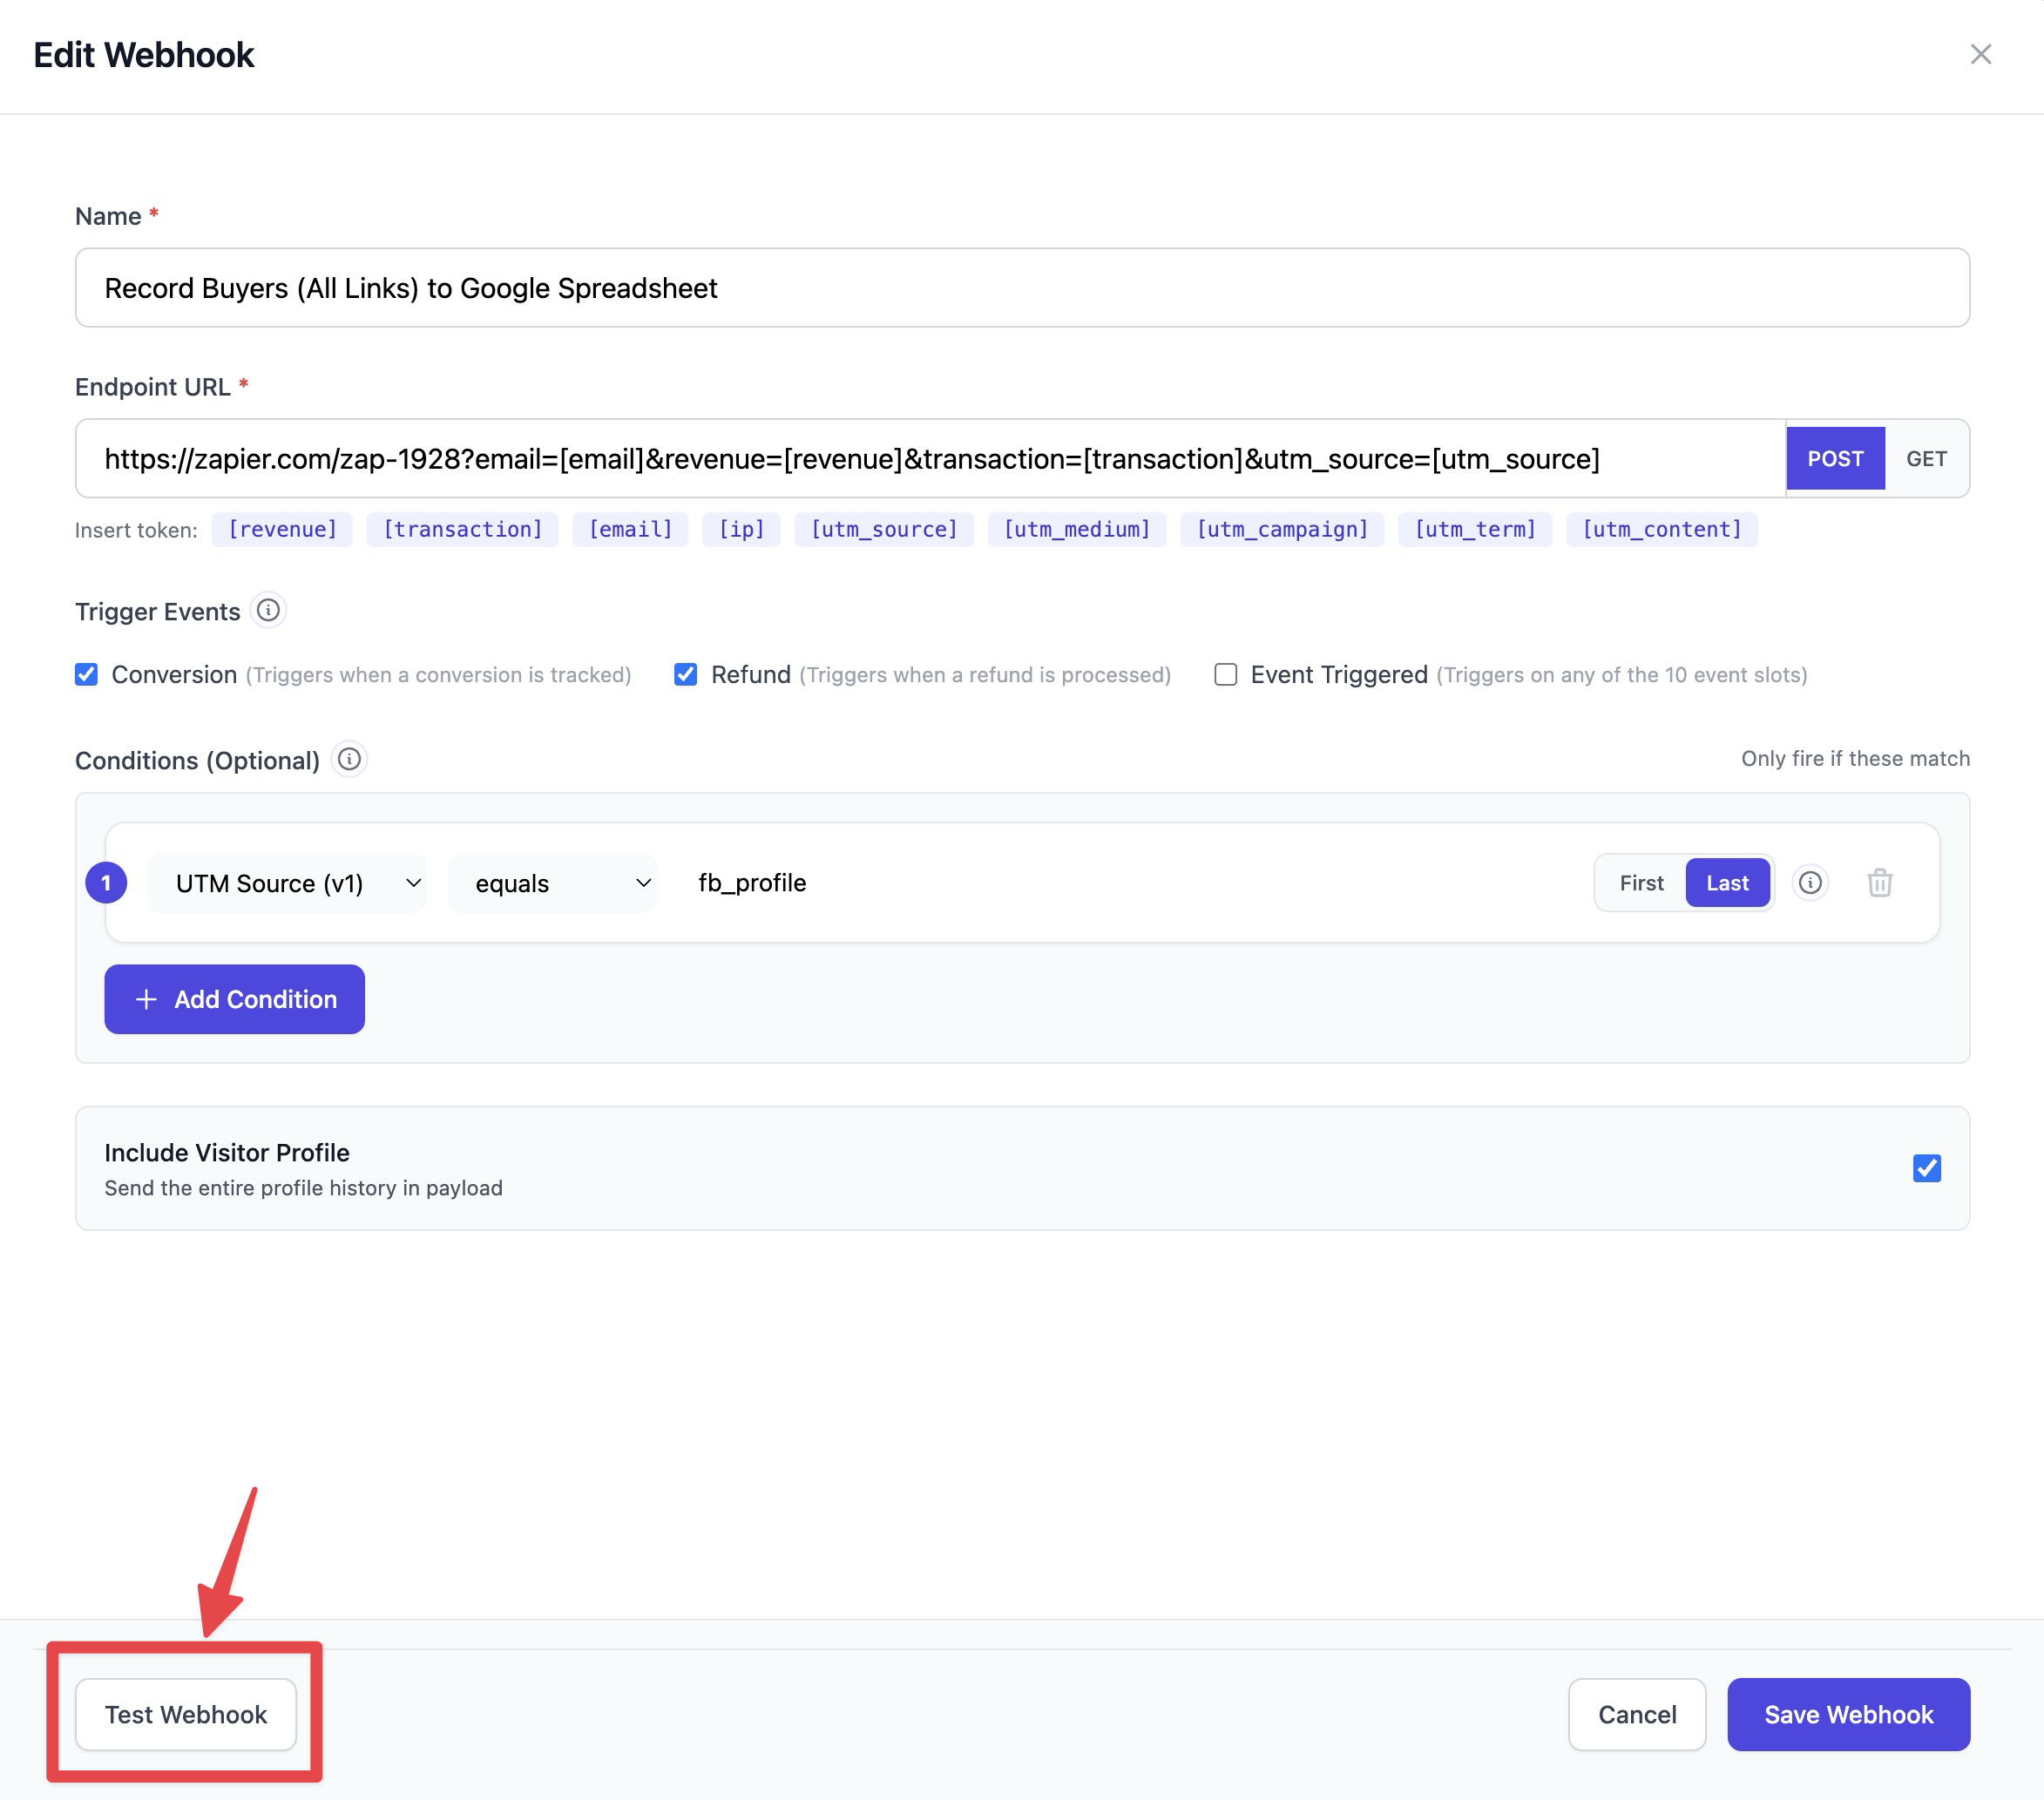
Conditions allow you to filter which events trigger the webhook. Only events matching all conditions will fire the webhook.
Available condition fields include:
- UTM parameters: utm_source, utm_medium, utm_campaign, utm_content, utm_term
- Geographic: country
- Device info: deviceType
- Traffic source: referrer, isFromGoogleAds, isFromFacebookAds, isFromTikTokAds
- Metrics: revenue, qualityScore, conversionCount, eventCount
- Link filtering: linkId, targetId, eventNumber
Each condition has a field, operator (equals, contains, starts with, etc.), and value. Multiple conditions are combined with AND logic - all must match for the webhook to fire.
Example: To only fire webhooks for Facebook traffic with conversions over $50, add two conditions: "From Facebook Ads equals True" AND "revenue is at least 50".

Per-Condition Attribution
When using UTM parameters or identity fields in conditions, you can choose which click data to use for matching: First Click or Last Click.
What is Attribution?
In multi-touch marketing funnels, a visitor may interact with your campaigns multiple times before converting. The first click captures their initial touchpoint (e.g., a Facebook ad), while the last click captures their most recent touchpoint (e.g., a Google search).
The First/Last Toggle
For UTM and geographic conditions, you'll see a "1st" or "Last" toggle button. This determines which click data is used for that specific condition:
- First (First Click): Uses data from the visitor's first interaction with your tracking links
- Last (Last Click): Uses data from their most recent interaction before the event

Mixing Attribution Models
You can mix attribution models within the same rule. For example:
- "utm_source from First Click equals facebook" - Match visitors who originally came from Facebook
- "country from Last Click equals US" - But only if their most recent visit was from the US
This flexibility allows sophisticated filtering for complex marketing funnels where you need to consider both the original traffic source and the most recent engagement.
Note: The 1st/Last toggle only appears for fields that support attribution: utm_source, utm_medium, utm_campaign, utm_term, utm_content, country, deviceType, and referrer.
URL Tokens
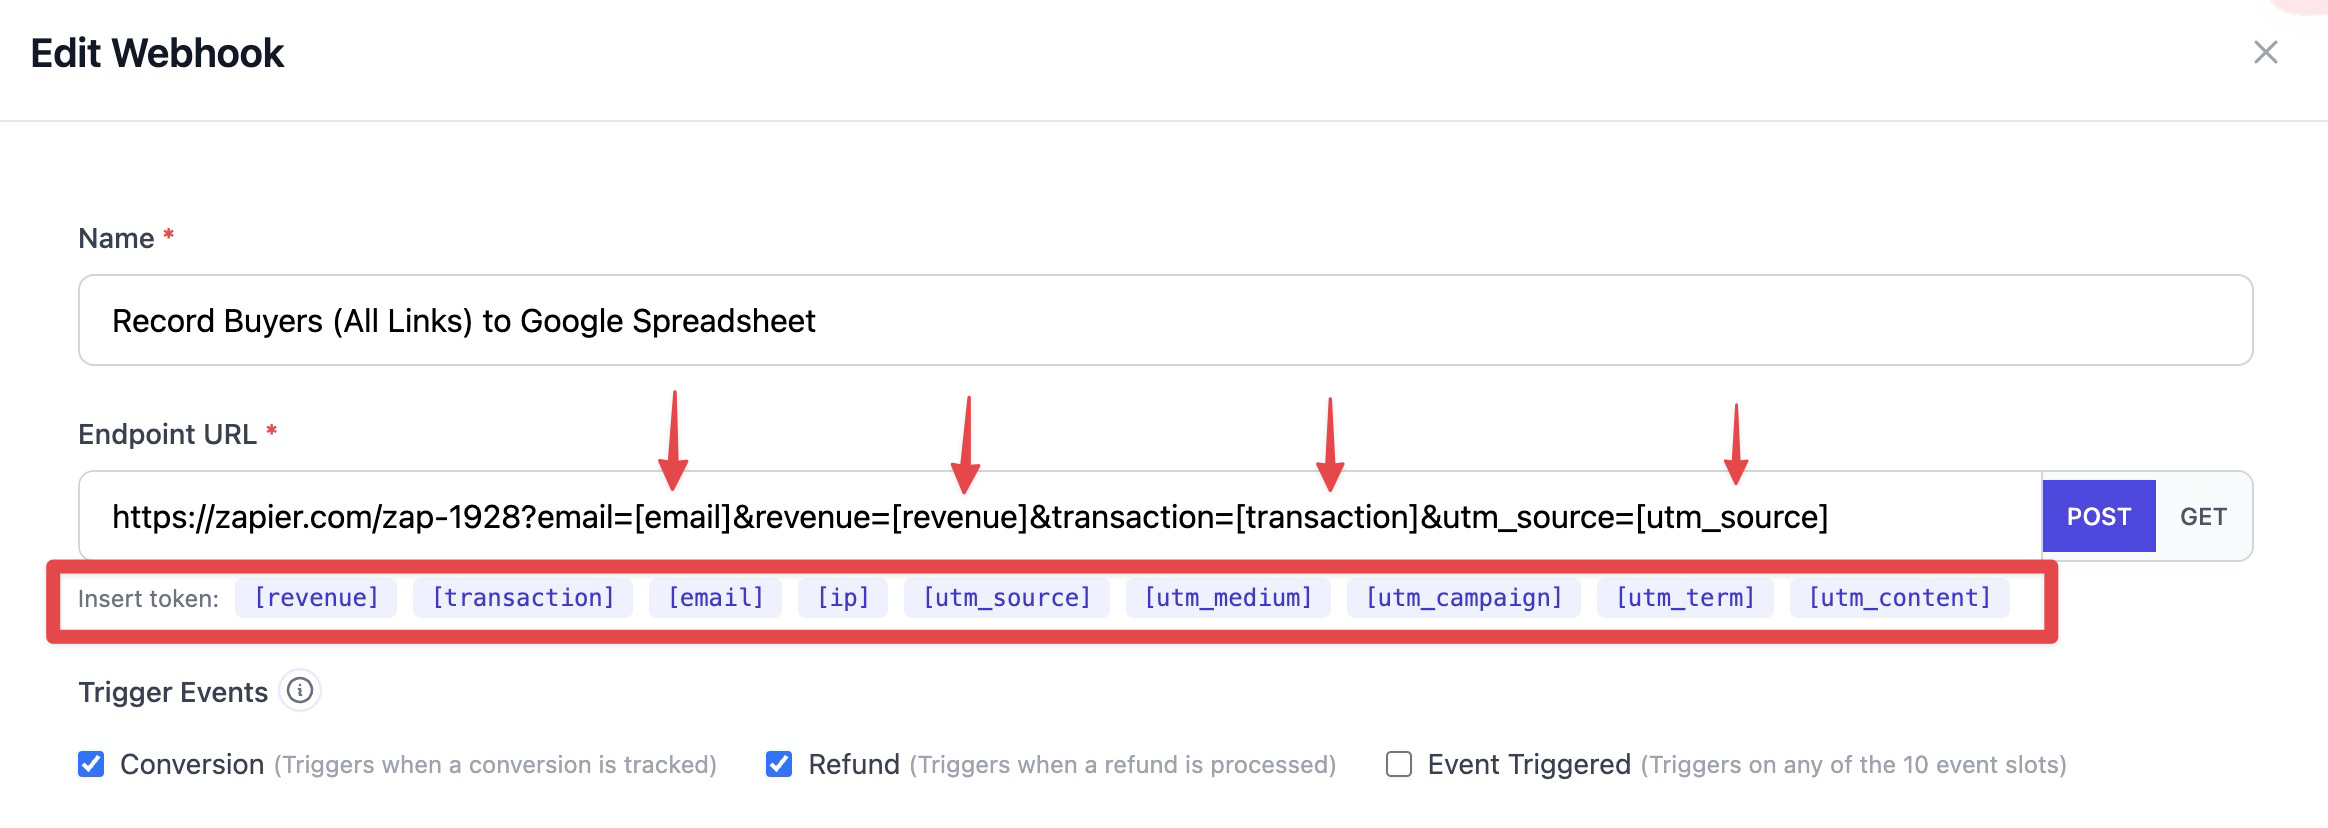
When configuring your webhook URL, you can use tokens that get replaced with actual values when the webhook fires. Click on a token to insert it at your cursor position.
Available Tokens
- [revenue] - Conversion revenue amount
- [transaction] - Transaction ID for the conversion
- [email] - Visitor email captured on the profile (PII)
- [ip] - Visitor IP address from the last click
- [utm_source] - utm_source from the visitor's last click (v1)
- [utm_medium] - utm_medium from the visitor's last click (v2)
- [utm_campaign] - utm_campaign from the visitor's last click (v3)
- [utm_term] - utm_term from the visitor's last click (v4)
- [utm_content] - utm_content from the visitor's last click (v5)
Example URLs with tokens:
https://api.example.com/track?amount=[revenue]&txn=[transaction]
https://syncmaster.io/subscribe?email=[email]&ip=[ip]&src=olsp-[utm_source]-[utm_medium]
How visitor tokens resolve: [email], [ip], and [utm_*] resolve from the visitor profile attached to the firing event. UTM and IP values come from the visitor's last click (most recent attribution before the event). If a value is missing on the profile, the token is replaced with an empty string so your endpoint URL stays well-formed. All values are URL-encoded automatically.
Testing Webhooks
Before enabling your webhook in production, use the Test button to send a sample request to your endpoint. This helps verify:
- Your endpoint URL is correct and accessible
- Your server correctly processes the webhook payload
- URL tokens are being replaced with sample values
The test will show you the response status code and body from your endpoint. A successful response is typically a 2xx status code.
Best Practices
- Use HTTPS endpoints for security
- Implement idempotency - webhooks may be retried on failure
- Respond quickly (under 5 seconds) to avoid timeouts
- Log webhook payloads for debugging
- Use conditions to reduce unnecessary webhook calls
- Test thoroughly before enabling for production traffic