Create Your First Tracking Link
Watch this quick 2-minute video tutorial where we walk through creating your first tracking link with 2 split-tested targets. You'll see the entire process from start to finish, including how to view your stats once clicks start coming in.
For more details about each option and advanced features, continue reading the step-by-step guide below.
Welcome to ClickerVolt! This guide will walk you through creating your first tracking link in just a few minutes. By the end, you'll have a working tracking link that you can use to monitor clicks and conversions.
A tracking link is a special URL that ClickerVolt provides to track every visitor who clicks it. You can then redirect those visitors to one or more destination URLs (called "targets").
Step 1: Navigate to Your Dashboard
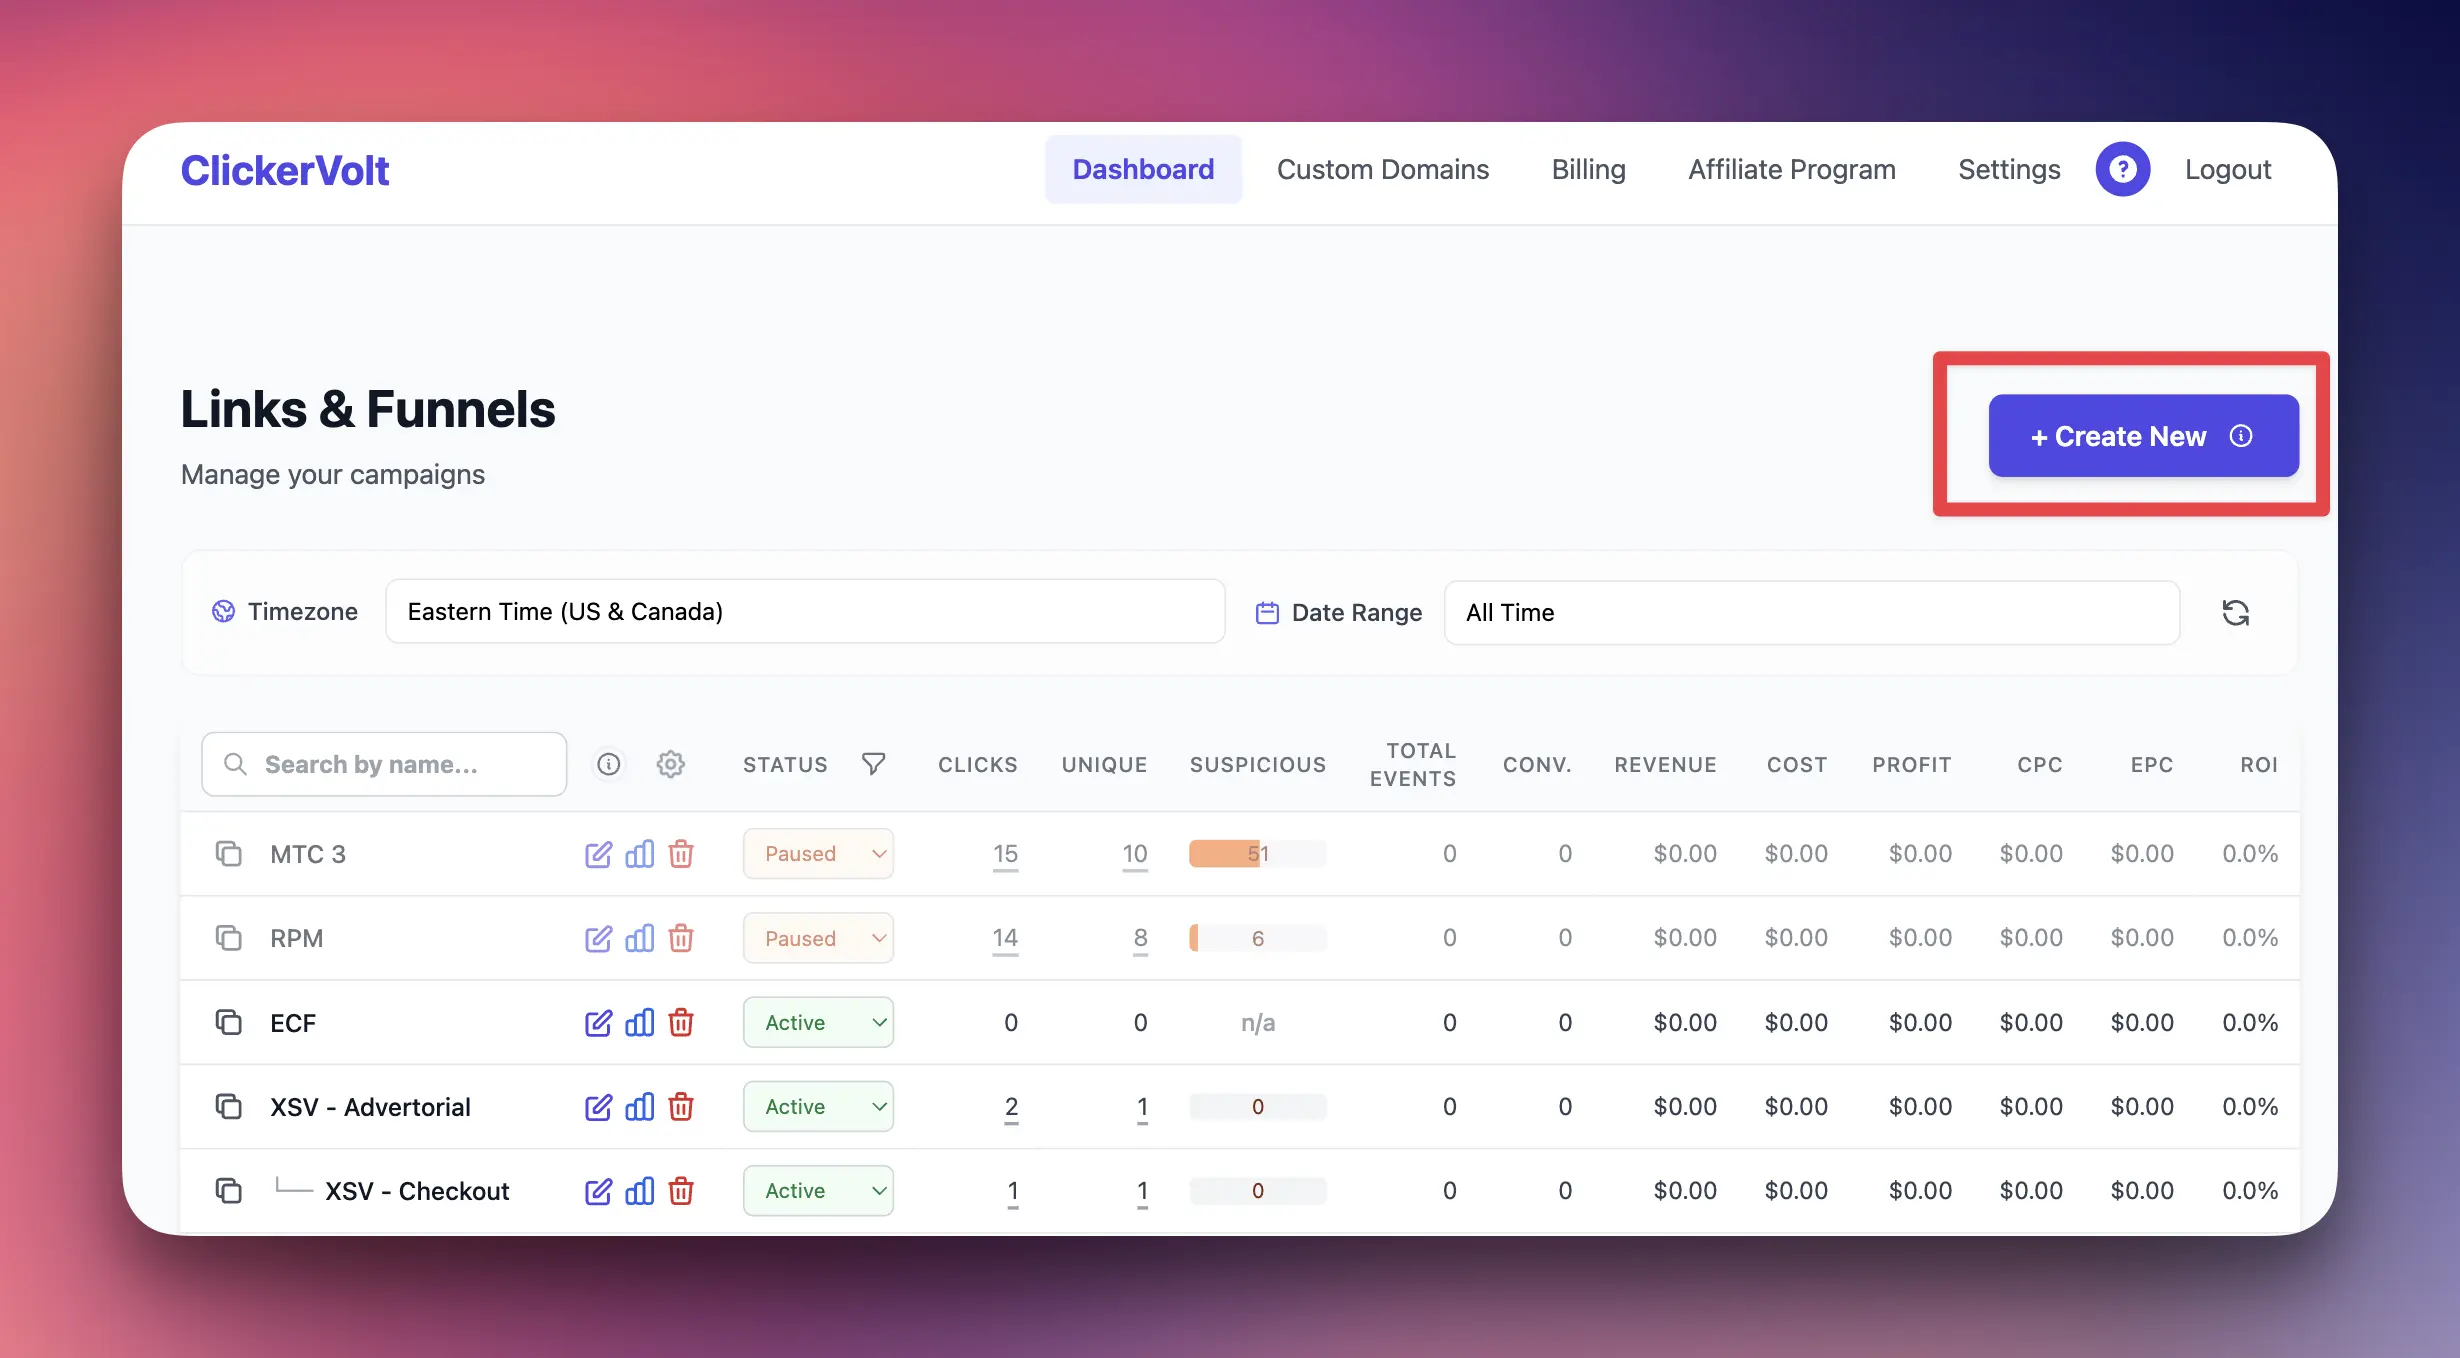
After logging in, you'll land on the ClickerVolt dashboard. This is your control center where you can see all your links and their performance statistics.
Look for the blue "Create New" button in the top right corner of the dashboard.
Step 2: Click "Create New"
Click the "New Link" button to open the link creation form. This form lets you configure all aspects of your tracking link.
Step 3: Enter a Link Name
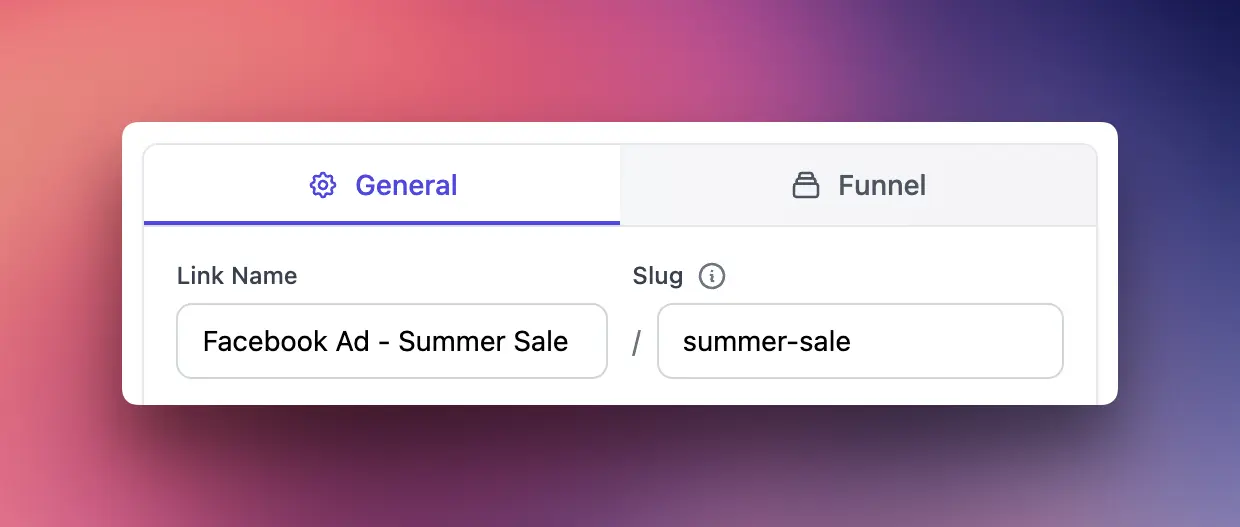
Give your link a descriptive name that helps you remember what it's for. This name is only visible to you in the dashboard.
Example: "Facebook Ad - Summer Sale" or "Email Campaign - Product Launch"
Step 4: Choose a URL Slug
The slug is the unique identifier in your tracking URL. It appears after your domain name.
For example, if your slug is "summer-sale", your tracking URL will be:
https://yourdomain.com/summer-sale
Slugs can only contain lowercase letters, numbers, and hyphens.
Step 5: Add Your First Target
A target is the destination URL where you want to send your visitors. Every link needs at least one target.
- Click the "Add Target" button
- Enter a name and paste your destination URL (e.g., https://yourwebsite.com/product)
- Click "Save" on the target form
You can add multiple targets if you want to split traffic between different destinations. We'll cover that in advanced guides.
Step 6: Save Your Link
Once you've filled in the basic information and added at least one target, click the "Save Link" button at the bottom of the form.
ClickerVolt will create your tracking link and take you back to the dashboard.
Step 7: Copy Your Tracking Link
Back on the dashboard, find your newly created link in the list. Look for the copy icon next to the link name.
- Click the copy icon to copy your tracking URL to the clipboard
- You can now paste this URL in your ads, emails, or social media posts
- When people click this link, ClickerVolt will track the click and redirect them to your target URL
Step 8: Test Your Link
Before using your link in a live campaign, it's a good idea to test it:
- Paste your tracking link into a new browser tab
- Press Enter to visit the link
- You should be redirected to your target URL
- Back in your ClickerVolt dashboard, you should see 1 click recorded within a few seconds
What's Next?
Congratulations! You've created your first tracking link. Here are some next steps:
- Learn about different rotation algorithms to split traffic between multiple targets
- Set up conversion tracking to measure sales and leads
- Configure custom domains for branded tracking links
- Explore the statistics dashboard to analyze your traffic
Advanced Topics
Once you're comfortable with the basics, explore these advanced features:
Multiple Targets with Traffic Distribution
You can add multiple target URLs to a single tracking link and split traffic between them. This is perfect for A/B testing different landing pages or offers.
When you add multiple targets, ClickerVolt uses a "rotation algorithm" to decide which target each visitor sees. The default algorithm is "Weighted Random", which distributes traffic based on the weight you assign to each target.
Link Status: Active, Paused, and Archived
You can change your link's status at any time:
- Active: Link is live and accepting traffic
- Paused: Temporarily stops accepting traffic (useful when pausing campaigns)
- Archived: Hides the link from your dashboard but keeps all data
- Deleted: Permanently removes the link and makes the slug available for reuse
Using Custom Domains
Instead of using the default ClickerVolt domain, you can use your own custom domain for tracking links. This makes your links look more professional and branded.
To use a custom domain, you'll need to add it in the Custom Domains section first, then select it when creating or editing a link.
Troubleshooting
Link not redirecting: Make sure your link status is "Active" and that you've added at least one target with a valid URL.
Clicks not being tracked: Wait a few seconds for the data to appear. Statistics are updated in near real-time but may have a slight delay.
Slug already taken: Each slug must be unique across your account. Try a different slug or check if you have an old link using that slug.